
Download/Install Epson Receipt Printer Drivers in Windows 10 and 11
Epson provides multiple models of thermal receipt printers, including the TM-T20II and TM-T20III models. This article will guide you through the process of downloading and installing Epson printer drivers on your Windows computer.
Several TheOpenRoad products utilize receipt printing in workflows, if you are a TheOpenRoad Employee configuring receipt printing for internal applications; refer to the specific guide provided by your department I.T Administrator.
Downloading the Epson printer drivers
2. Choose your Epson receipt printer model, this can be found on the sticker beneath the printer and begins with TM-.
3. You will be redirected to the product page of your chosen model, scroll down to the Operating System dropdown and select Windows 10 64-bit or Windows 11.
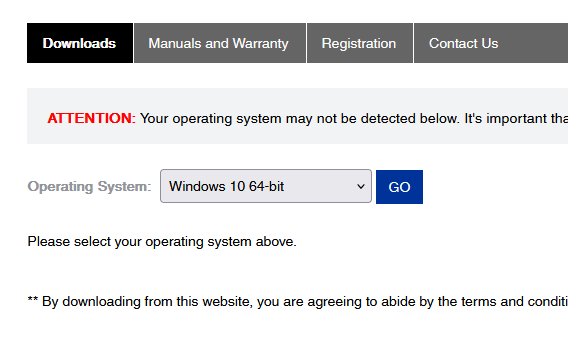
4. Click GO beside the dropdown, you will then be redirected to a list of driver files available for download.
5. Scroll down until you see the Drivers link, click to expand it. You will then see the complete list of downloadable files.
6. In order to print to your Epson receipt printer via USB, you must download the appropriate USB driver, select the TMUSB Device Driver v800d download link from the list below. An application file will be downloaded.
Installing the Epson printer drivers
1. Locate the application file in the Downloads folder of your computer in File Explorer, or drag the downloaded file from your browser to your desktop and double-click the file to open it; you should then see Windows File Explorer open the file and display its contents.
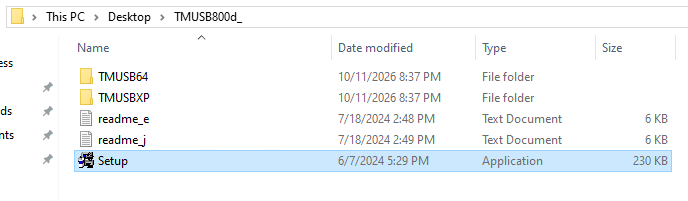
2. Double-click the highlighted file in blue as seen in the image above to open it, you should then see the Epson Driver Installation Wizard launch, press the Next button in the bottom right corner to proceed.
3. You will then be prompted by Epson to accept their SLA, (Service License Agreement) select: I accept this SLA, and then click Next if you agree and would like to continue the installation.
4. The Epson installation wizard will take a few moments to download & install the files onto your computer, when this is successfully completed; you will be prompted with the following success prompt.
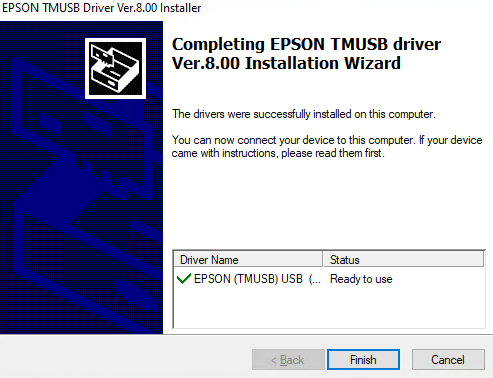
5. Click Finish to confirm the success dialogue and return to your computer, the installation for this driver is now complete.
6. Repeat the same steps to install the EPSON Advanced Printer Driver 6, and any drivers that shall be downloaded and installed on your computer in the future.
7. Once all required drivers are downloaded and installed on your computer successfully, your Epson receipt printer should now work with your computer as intended; which indicates the printer has been configured for your computer successfully.
Helpful resources
About this article
- Written by Marv Eaton, a TheOpenRoad Support employee.
- Still need help? Please write to us in the comment section below or contact TheOpenRoad support.

Please rate your experience with this article today:
When you select a number, 1 being the lowest and 9 being the highest; the page will refresh and your feedback will be submitted to TheOpenRoad.
No comments to display
No comments to display